-
|
 EN
EN
EN
EN
 TEL
TEL E-MAIL
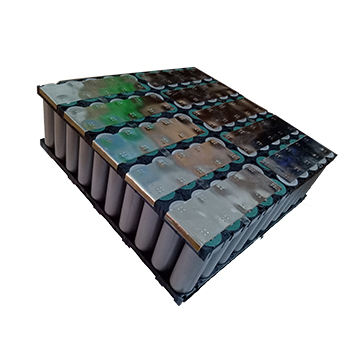
Important notes:
● When charging is required, first plug in the plug of the battery end, and then plug in the plug of the listed terminal; after charging is completed, first unplug the mains terminal, then unplug the battery end.
● Generally, the head of the plug has a piece of plastic wrap, and it is pinched here for insertion and removal. If it is directly pulled out, it is easy to cause the line inside to break.
● It is strictly forbidden to change the direction of the internal fan blowing and the installation direction of the circuit board. The internal structure of our charger is determined based on the perfect aging comparison test and the failure rate comparison for many years. Users who change the structure without authorization will greatly increase the rate of the charger. In addition, it is emphasized that damage caused by violation of this item is not covered by the warranty.
● When carrying this charger, please wrap it with a shock-proof material such as bubble film or pearl cotton, and pay attention to waterproof.
● Under certain conditions, the air outlet is slightly higher to facilitate internal heat dissipation.
Operation instructions:
1. Turn on the battery and turn on the mains. After the display is stable, the upper row of the charger shows the actual voltage of the battery pack. If it is 36v, 48v or the battery level has been set, the charger will automatically charge around 8s.
2. When charging is performed, the upper row will display the charging voltage of the battery pack, and the lower row will display the charging current. Pressing the inquiry button will display the current charging level and the current internal temperature.
3. After charging is completed, the fourth decimal point of the upper row will flash and the surface charge is completed. During the charging process, the parameters of the charger cannot be modified and saved. Therefore, to modify the charger parameters, the setting button must be pressed within 8 seconds after the battery voltage is displayed in the upper row.
4. The new machine presses the Set button to enter the setting program, and the lower row displays AH10, which can be adjusted by addition and subtraction (maximum AH20, minimum AH5).
AH20 stands for maximum charging current, short charging time and short battery life.
AH5 stands for minimum charging current, long charging time and longest battery life.
5. Press the setting button again, the lower display shows U-04. This parameter is the charging termination voltage level, which can be controlled by the plus or minus buttons.
6. Press the Set button again. The lower row shows A-02 (lighting current, parameter in 2A version), 3904 (limited voltage, 2ALP and 2ALH versions, indicating that the voltage limit is 39.04v, can be adjusted You need the lithium battery's voltage limit, after adjusting the pressure limit, you must adjust the CU parameters to the LP file.
7. Press the button again, the lower row will display DA02 (reduction factor, generally not recommended)
8. Press the Set button again. The lower row will display the CU parameters. The order of the 2A version of the CU parameters from high to low is (CU00/CU00/CU00/CU00/CU72/CU64/CU60/CU48/CU36). The 2ALP version of the CU parameter arrangement is (CULP/CULP/CU00/CU00/CU72/CU64/CU60/CU48/CU36). The 2ALH version of the CU parameter arrangement is (CULP/CU96/CU874/CU80/CU72/CU64/CU60/CU48 /CU36) When charging the lithium battery with the voltage limiting method, it is necessary to adjust to the CULP. The third parameter's voltage limiting value will be valid. When the charger is charged to the voltage limit, the current will be reduced and then stopped. If it is lead-charged, just adjust to the corresponding battery voltage, such as 72V lead-acid battery, just call CU72.
9. Press the SET button again, cd12 will appear in the lower row (charger timing time, generally no need to change).
10. Press the Set button again, the display number in the upper and lower rows will change to zero at the same time, indicating that the setup program is completed and saved. (Common operation error: the user cannot save the set parameters.) Note that only the first setting cycle can be saved. After many users enter the setting program, the six parameters are browsed first, and then the setting program is modified. The modified parameters will not be saved.

Lead-acid battery charging precautions:
● For most lead-acid battery users, just learn step 4 in the setup operation to modify AH to control the current; step 8 select the corresponding battery pack. If the user is interested, you can slowly learn about other parameters during use. For example: 60V20AH users, only run a few kilometers per day, step 4 is changed to AH05, step 8 is set to CU60; half run every day, step 4 is changed to AH10; run photoelectric every day, charging time is more than ten hours, step 8 is modified Into AH14; run photoelectric every day, charging time is less than ten hours, you can adjust to AH20.
● After the end of charging, if there is still time, it is better to let the charger be plugged in, Hanyun will automatically switch to the small current desulfurization mode, which will have a good maintenance effect on the battery. Lithium battery charging precautions:
● For lithium battery users, the 2ALP and 2ALH models will introduce a voltage limiting control to match the charging of the lithium battery pack. Focus on understanding the step 7 in the setting operation. Only the appropriate voltage limit of the charger can be set to match the corresponding lithium battery pack; then remember to adjust step 8 to CULP, so that the charger enters the voltage limiting mode.
● Lithium-ion battery must have limited pressure data. If you know the type and number of strings of the charged lithium battery pack, you can calculate the voltage limit value. Lithium-ion type iron lithium is 3.6-3.65v/string; ternary or lithium ion is 4.1-4.2V/string. Multiplying the number of strings is the limit value of the battery pack. For example, 16 series of iron and lithium, the limit value should be 3.65X16=58.4V. For example, 17 strings of three yuan, the limit value should be 4.2X17 = 71.4V or so.
● If you don't know the type and number of strings, you can also get the information on the voltage limit value from the original lithium battery charger. The original charger is usually marked with a limited voltage. Many battery names are also marked with the highest charging voltage.
● For iron-lithium batteries, due to the strong overcharge resistance, the voltage limit setting can be slightly higher. For ternary and lithium ions, the overcharge will seriously affect the battery life, and the limit voltage setting can be lower when the mileage is sufficient. For example, 17 strings of ternary, 71V, 70V or even 69V pressure limit are optional, low pressure limit, will affect the total riding mileage, but the cycle life can be improved a lot.
● After the lithium battery mode is completed, the charger will automatically switch to the small current equalization mode with the current value less than 100mA. The balance function of the protection board can achieve the balance of the lithium battery. Users of 60V and 48V lead acid are specially reminded that non-60V and 48V users can ignore this reminder: when riding to battery protection
In the future, the battery pack will be under-voltage severely, and may not be charged. For example, the 60V battery is used up. After the charger is connected, the upper row shows 57.54, and the lower row shows 0048. If no intervention, 8 seconds later. It will be charged automatically, but since the battery has been recognized as a 48V battery pack, the fourth decimal point in the upper row will flash quickly and the charging will be terminated immediately. Therefore, when powering up, if 60V battery pack, the lower row shows 0048, you should immediately press the level button for manual intervention, C048 will appear in the lower row, press the level button again, C060 will appear in the lower row, then press start again. When the button is pressed, the battery will be forcibly switched to the 60V battery mode. If the 48V battery pack is seriously underpowered and the lower row appears 0036, you need to use the level button to adjust to C048 and then press the start button to manually start charging.
Simple troubleshooting:
1. Sometimes the power-on point does not have a display screen, and the plug can be clicked, which is getting more and more serious. This is a plug problem, cut the plug and replace it.
2, suddenly not bright, disassemble look at the protective wire, if the protective wire is not blown, but with a multimeter to measure the circuit has been broken, please replace a 250V5A fuse try. If the protective wire is blown up, it indicates that there is a short circuit. Users who have no maintenance experience are advised to contact customer service for repair.
3, power-on display is normal, can not be charged, plug the battery end plug, the upper row shows the voltage unchanged, if you change the other car, the upper row shows that the voltage remains unchanged, then the output plug is generally broken, you can directly replace the output head. If it is charged with lithium, it is necessary to check whether it is over-protection of the protection board.
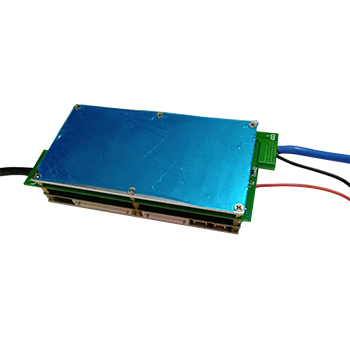
 RELATED PRODUCTS
 No. 10 Changfengqiao Road, Lanjiang Street, Yuyao City, Zhejiang Province, China
 188 9267 3883 (Wechat)
 472565226@qq.com